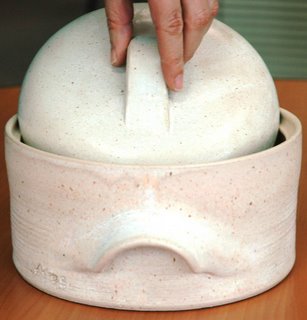
A variation on a theme...
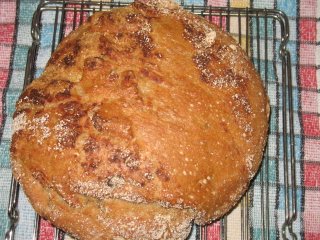
Ok, maybe I have become a bit obsessed with this bread. Or maybe I have become a bit obsessed with using my own pottery to cook in. Or, just maybe, this bread is so forgiving that even with my cantankerous oven, what starts off looking completely unpromising turns into something I can be proud of.
Maybe it is a combination of all three and, just to top it off, there is nothing like the smell or taste of freshly baked bread warm from the oven.
I started a regular batch of The Bread (aka Jim Lahey's Sullivan Street Bakery No-Knead Bread) on Thursday night after I had been stood up by a blind date. Nothing like anticipating for the future when the present has given you a raspberry. But it was my gain on Friday when a beautiful loaf came out of the oven just in time to share with SistR and her family for Shabbat dinner. Blessed by providence and a great recipe!

Friday evening I decided I would try a variation on a theme and made a mixed grain version. I did start out by following the original recipe but because I used a mixture of different textures and types of grains, I realized, at the 12 hour mark, when I took a peak to see how things were progressing, that something wasn't right... my oops somewhere. The recipe below is after correcting my mistake (I threw in more food for the yeast).
No -Knead Bread - a mixed grain version
Adapted from Jim Lahey, Sullivan Street Bakery
Time: About 1½ hours plus 14 to 20 hours’ rising
3 1/2 cups all-purpose or bread flour, more for dusting
1/4 cup each ground barley and millet
(I put mine through an old fashioned coffee mill twice)
1/4 cup each buckwheat and spelt flour
1/2 cup whole wheat flour
¼ teaspoon instant yeast
1¼ teaspoons salt
1 3/4 cups water
(getting the original 1 5/8 is difficult for me...)
Cornmeal or wheat bran as needed (I used a mixture of both).
Pour 1/2 cup boiling water over barley and millet & let soak until cooled.
In a large bowl combine flours, yeast and salt. Add 1 1/4 cups water, and stir until blended; dough will be shaggy and sticky. Cover bowl with plastic wrap. Let dough rest at least 12 hours, preferably about 18, at warm room temperature, about 70 degrees.
Dough is ready when its surface is dotted with bubbles. Lightly flour a work surface and place dough on it; sprinkle it with a little more flour and fold it over on itself once or twice. Cover loosely with plastic wrap and let rest about 15 minutes.
Using just enough flour to keep dough from sticking to work surface or to your fingers, gently and quickly shape dough into a ball. Generously coat a cotton towel (not terry cloth) with flour, wheat bran or cornmeal; put dough seam side down on towel and dust with more flour, bran or cornmeal. Cover with another cotton towel and let rise for about 2 hours. When it is ready, dough will be more than double in size and will not readily spring back when poked with a finger.
At least a half-hour before dough is ready, heat oven to 450 degrees. Put a 6- to 8-quart heavy covered pot (cast iron, enamel, Pyrex or ceramic) in oven as it heats. When dough is ready, carefully remove pot from oven. Slide your hand under towel and turn dough over into pot, seam side up; it may look like a mess, but that is O.K. Shake pan once or twice if dough is unevenly distributed; it will straighten out as it bakes. Cover with lid and bake 30 minutes, then remove lid and bake another 15 to 30 minutes, until loaf is beautifully browned. Cool on a rack.

I was a little dubious about this because the dough was very, very wet (I guess the other flours don't absorb water as easily) , but this came out of the oven looking amazing, smelling irresistable and tasting phenomenal, with a light fluffy interior made chewy and rich by the various grains and a crust that shatterered when bitten into. Who needs butter?
My other project for the day was to finish making my chestnut puree. I gently warmed the cooked chestnut and cream mixture that I prepared yesterday evening (when it was cold it was thick and claggy and would have choked my stick blender), and then used the said stick blender to puree this until it was smooth as satin. This took a fairly long while because there was about 500gr of peeled chestnuts and 1/2 cup cream. But my patience was rewarded, because there is nothing grainy or coarse about this stuff.
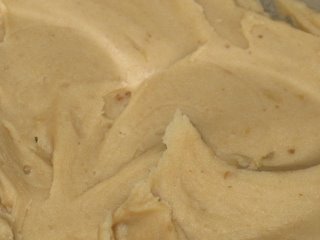
So what am I going to do with this? Something I haven't had in about 15 years, but can still taste... This is one of my favourite desserts of all time. I think of this in conjunction with gleaming silver and shining crystal because my mom only ever made this dessert for guests. I don't think I ever had this except as a leftover. Which is kind of a good thing because, if you like chestnuts, this is completely addictive!
My Mom's Cold Chestnut Souffle - 4 eggs + 2 egg yolks
- 1/2 c sugar
- 1 tbsp gelatine
- 6 tbsp rum
- 1 c sweetened chestnut puree
(if you are using unsweetened, adjust amount of sugar) - 1 c heavy cream whipped until stiff
Have ready a 3/4 litre souffle dish with a standing collar made from silicone or waxed paper
Dissolve gelatine and rum over hot water, let cool while you beat the eggs, yolks and sugar until very thick and pale (at least 10 minutes)
Beat the cooled rum mixture quickly into eggs, then add the puree slowly, so as not to lose air.
Gently fold in the whipped cream, then scrape the mixture into the souffle dish (don't forget to put the collar on first!). Run a knife carefully through the mixture to get rid of any big bubbles, then chill thoroughly until set (6-8 hours)
My mom's original recipe said to serve this decorated with whipped cream rosettes and glaceed marron halves before carefully removing the collar. But I always remember this being served in a beautiful Orrefors crystal bowl with nothing more than a circle of whipped cream piped around the edges.
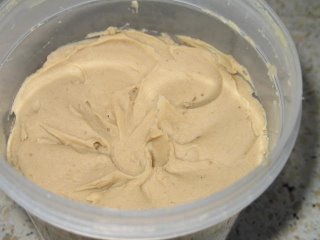
This is just another gratuitous picture of the chestnut puree...
in anticipation of the souffle.


 Christmas BethLehem (Christmas House Bread)

 I got a few